前段时间有位博友向我询问如何在 Hugo 的 MemE 主题中添加轮播图功能。我以前见过一些博客,在首页的文章目录上方放置有一个轮播图。与各种网站上的轮播图功能类似,通过轮播图,可以吸引读者访问博主推荐阅读的文章。NexT 和 MemE 主题都没有自带这一功能,以前看过的轮播图只是一些博主进行 DIY 的结果。
我没有使用轮播图的需求,所以没有仔细研究过如何添加轮播图。不过既然有博友向我询问了,不妨尝试一下。本文提供了一种实现轮播图功能的思路。所谓「一种思路」,就是说我提供的这种方法只是一次简单的尝试,个人能力有限,还有很多值得完善的地方,方法仅供参考。
首先我参考了 Sanarous 在 CSDN 上的文章:《 Hexo 博客首页添加轮播图 》。作者在文中给出了在 NexT 中添加轮播图的详细代码。如果将代码完全复制到 Hugo 中显然不行。首先我对文中的代码进行整理,新建了一个页面进行效果展示,将 HTML 代码放到页面中,将 CSS 代码放到主题的 _custom.scss 中。具体代码如下:
HTML:
 1
 2
 3
 4
 5
 6
 7
 8
 9
10
11
12
13
14
15
16
17
18
19
20
21
22
23
24
25
26
27
28
29
30
31
32
33
34
35
36
37
38
39
< script src = "https://cdn.staticfile.org/jquery/2.1.1/jquery.min.js" ></ script >
< script src = "https://cdn.staticfile.org/twitter-bootstrap/3.3.7/js/bootstrap.min.js" ></ script >
< div width = "100%" height = "320px" style = "border: 0px; overflow: hidden; border-radius: 10px;" scrolling = "no" >
< div id = "myCarousel" class = "carousel slide" data-ride = "carousel" data-interval = "3500" >
< ol class = "carousel-indicators" > <!--这里手动设置五个轮播图-->
< li data-target = "#myCarousel" data-slide-to = "0" ></ li >
< li data-target = "#myCarousel" data-slide-to = "1" ></ li >
< li data-target = "#myCarousel" data-slide-to = "2" ></ li >
< li data-target = "#myCarousel" data-slide-to = "3" ></ li >
< li data-target = "#myCarousel" data-slide-to = "4" ></ li >
</ ol >
<!-- 轮播(Carousel)项目 -->
< div class = "carousel-inner" style = "height: 280px; border-radius: 10px; width: 100%;" >
< a class = "item active" href = "超链接地址 1" target = "_blank" style = "height: 100%;" >
< img src = "图片地址 1" style = "width: 100%; height: 100%" >
</ a >
< a class = "item" href = "超链接地址 2" target = "_blank" style = "height: 100%;" >
< img src = "图片地址 2" style = "width: 100%; height: 100%;" >
</ a >
< a class = "item" href = "超链接地址 3" target = "_blank" style = "height: 100%;" >
< img src = "图片地址 3" style = "width: 100%; height: 100%;" >
</ a >
< a class = "item" href = "超链接地址 4" target = "_blank" style = "height: 100%;" >
< img src = "图片地址 4" style = "width: 100%; height: 100%;" >
</ a >
< a class = "item" href = "超链接地址 5" target = "_blank" style = "height: 100%;" >
< img src = "图片地址 5" style = "width: 100%; height: 100%;" >
</ a >
</ div >
<!-- 轮播(Carousel)导航 -->
< a class = "left carousel-control" href = "#myCarousel" role = "button" data-slide = "prev" >
< span class = "glyphicon glyphicon-chevron-left" aria-hidden = "true" ></ span >
</ a >
< a class = "right carousel-control" href = "#myCarousel" role = "button" data-slide = "next" >
< span class = "glyphicon glyphicon-chevron-right" aria-hidden = "true" ></ span >
</ a >
</ div >
</ div >
CSS:
  1
  2
  3
  4
  5
  6
  7
  8
  9
 10
 11
 12
 13
 14
 15
 16
 17
 18
 19
 20
 21
 22
 23
 24
 25
 26
 27
 28
 29
 30
 31
 32
 33
 34
 35
 36
 37
 38
 39
 40
 41
 42
 43
 44
 45
 46
 47
 48
 49
 50
 51
 52
 53
 54
 55
 56
 57
 58
 59
 60
 61
 62
 63
 64
 65
 66
 67
 68
 69
 70
 71
 72
 73
 74
 75
 76
 77
 78
 79
 80
 81
 82
 83
 84
 85
 86
 87
 88
 89
 90
 91
 92
 93
 94
 95
 96
 97
 98
 99
100
101
102
103
104
105
106
107
108
109
110
111
112
113
114
115
116
117
118
119
120
121
122
123
124
125
126
127
128
129
130
131
132
133
134
135
. carousel {
width : 100 % ;
height : 100 % ;
position : relative ;
}
. carousel-inner {
position : relative ;
overflow : hidden ;
width : 100 % ;
> .item {
display : none ;
position : relative ;
transition : 0.6 s ease-in-out left ;
> img,
> a > img {
line-height : 1 ;
margin : 0 !important ;
}
}
> . active {
display : block ;
left : 0 ;
&.left {
left : -100 % ;
}
& . right {
left : 100 % ;
}
}
> . next {
display : block ;
position : absolute ;
top : 0 ;
width : 100 % ;
left : 100 % ;
&.left {
left : 0 ;
}
}
> . prev {
display : block ;
position : absolute ;
top : 0 ;
width : 100 % ;
left : -100 % ;
&.right {
left : 0 ;
}
}
}
. carousel-control {
position : absolute ;
top : 0 ;
left : 0 ;
bottom : 0 ;
width : 15 % ;
opacity : 0.5 ;
font-size : 20 px ;
color : #fff ;
text-align : center ;
text-shadow : 0 1 px 2 px rgba ( 0 , 0 , 0 , 0.6 );
background-color : rgba ( 0 , 0 , 0 , 0 );
&.left {
background-image : linear-gradient ( to right , rgba ( 0 , 0 , 0 , 0.5 ) 0 % , rgba ( 0 , 0 , 0 , 0.0001 ) 100 % );
background-repeat : repeat-x ;
}
& . right {
left : auto ;
right : 0 ;
background-image : linear-gradient ( to right , rgba ( 0 , 0 , 0 , 0.0001 ) 0 % , rgba ( 0 , 0 , 0 , 0.5 ) 100 % );
background-repeat : repeat-x ;
}
& : hover ,
& : focus {
outline : 0 ;
color : #fff ;
text-decoration : none ;
opacity : 0.9 ;
}
. glyphicon-chevron-left {
position : absolute ;
top : 50 % ;
left : 50 % ;
margin-top : -10 px ;
margin-left : -10 px ;
z-index : 5 ;
display : inline-block ;
&:before{
content : "《"
}
}
. glyphicon-chevron-right {
position : absolute ;
top : 50 % ;
right : 50 % ;
margin-top : -10 px ;
margin-right : -10 px ;
z-index : 5 ;
display : inline-block ;
&:before{
content : "》"
}
}
}
. carousel-indicators {
position : absolute ;
bottom : 10 px !important ;
left : 50 % ;
z-index : 15 ;
width : 60 % ;
margin-left : -30 % !important ;
padding-left : 0 !important ;
list-style : none ;
text-align : center ;
li {
display : inline-block ;
width : 10 px ;
height : 10 px ;
margin : 1 px ;
text-indent : -999 px ;
border : 1 px solid #fff ;
border-radius : 10 px ;
cursor : pointer ;
background-color : rgba ( 0 , 0 , 0 , 0 );
}
. active {
margin : 0 ;
width : 12 px ;
height : 12 px ;
background-color : #fff ;
}
}
注意,原文中的代码可以通过检索配置文件中插入的图片个数自动生成对应数目的轮播图,但原文代码的循环语句在 Hugo 中不适用。为了方便对主题进行适配,先直接采用无脑列举的方法,而不是添加循环语句。
现在具体的代码已经写好了,接下来需要考虑将图片的设定插入到主题配置文件 config.toml 中。
首先在主题配置文件 config.toml 中的 [params] 下创建新配置:
1
2
3
4
5
6
7
8
# 自定义轮播图功能

# 是否开启轮播图
enableCarousel = true
# 轮播图展示的第一幅图的超链接
carouselActiveUrl = "超链接地址 1"
# 轮播图展示的第一幅图的地址
carouselActiveImage = "图片地址 1"
配置中的各项内容说明已在代码中注释。这里需要注意,在我们访问到有轮播图的这一页面的时候,轮播图首先要展示一幅图片,然后再向左滑动展示第二幅图,第一幅图 HTML 代码中的 class 最开始的状态即为 active,所以第一幅图需要单独配置。
至于轮播图中其他图的配置,单独创建一个文件储存即可。我们首先在文件夹的根目录下创建 data 文件夹(即 SVG.toml 所在的文件夹,如果已有该文件夹则忽略此步骤)。然后在 data 文件夹下创建 carousel.toml 文件。在该文件中,填写如下内容:
 1
 2
 3
 4
 5
 6
 7
 8
 9
10
11
12
13
14
[[ carousel ]]
url = "超链接地址 2"
image = "图片地址 2"
weight = 1
[[ carousel ]]
url = "超链接地址 3"
image = "图片地址 3"
weight = 2
[[ carousel ]]
url = "超链接地址 4"
image = "图片地址 4"
weight = 3
除了你要展示的第一幅图(第一幅图已在主题配置文件 config.toml 中配置过了),其他图片的超链接和地址都按照这样的格式添加到文件中。即如果你要展示 5 幅图,将第 1 幅图配置在 config.toml 中,后 4 幅图配置在 carousel.toml 中。在 carousel.toml 中,每个图的设定中有个 weight 权重设置。即,要展示的 5 幅图中,在 config.toml 中配置的第 1 幅图 weight = 0,这里不用再进行设置;第二幅图 weight = 1;第三幅图 weight = 2 ……以此类推。什么这么麻烦呢?因为我个人能力有限,暂时写不出更好的调用方式。
接着就将下面修改后的 HTML 代码添加到你想要放置轮播图的页面,CSS 的设定不变。注意这里的 HTML 代码中添加了循环语句,不能直接放置在 Markdown 中,因为无法直接转义。
 1
 2
 3
 4
 5
 6
 7
 8
 9
10
11
12
13
14
15
16
17
18
19
20
21
22
23
24
25
26
27
28
29
30
31
32
33
34
35
36
{{ if .Site.Params.enableCarousel }}
< script src = "https://cdn.staticfile.org/jquery/2.1.1/jquery.min.js" ></ script >
< script src = "https://cdn.staticfile.org/twitter-bootstrap/3.3.7/js/bootstrap.min.js" ></ script >
< div width = "100%" height = "320px" style = "border: 0px; overflow: hidden; border-radius: 10px;" scrolling = "no" >
< div id = "myCarousel" class = "carousel slide" data-ride = "carousel" data-interval = "3500" >
< ol class = "carousel-indicators" > <!--这里手动设置五个轮播图-->
< li data-target = "#myCarousel" data-slide-to = "0" ></ li >
{{ range .Site.Data.carousel }}
{{ range sort . "weight" }}
< li data-target = "#myCarousel" data-slide-to = "{{ .weight }}" ></ li >
{{ end }}
{{ end }}
</ ol >
<!-- 轮播(Carousel)项目 -->
< div class = "carousel-inner" style = "height: 280px; border-radius: 10px; width: 100%;" >
< a class = "item active" href = "{{ .Site.Params.carouselActiveUrl }}" target = "_blank" style = "height: 100%;" >
< img src = "{{ .Site.Params.carouselActiveImage }}" style = "width: 100%; height: 100%" >
</ a >
{{ range .Site.Data.carousel }}
{{ range sort . "weight" }}
< a class = "item" href = "{{ .url }}" target = "_blank" style = "height: 100%;" >
< img src = "{{ .image }}" style = "width: 100%; height: 100%" >
</ a >
{{ end }}
{{ end }}
</ div >
<!-- 轮播(Carousel)导航 -->
< a class = "left carousel-control" href = "#myCarousel" role = "button" data-slide = "prev" >
< span class = "glyphicon glyphicon-chevron-left" aria-hidden = "true" ></ span >
</ a >
< a class = "right carousel-control" href = "#myCarousel" role = "button" data-slide = "next" >
< span class = "glyphicon glyphicon-chevron-right" aria-hidden = "true" ></ span >
</ a >
</ div >
</ div >
{{ end }}
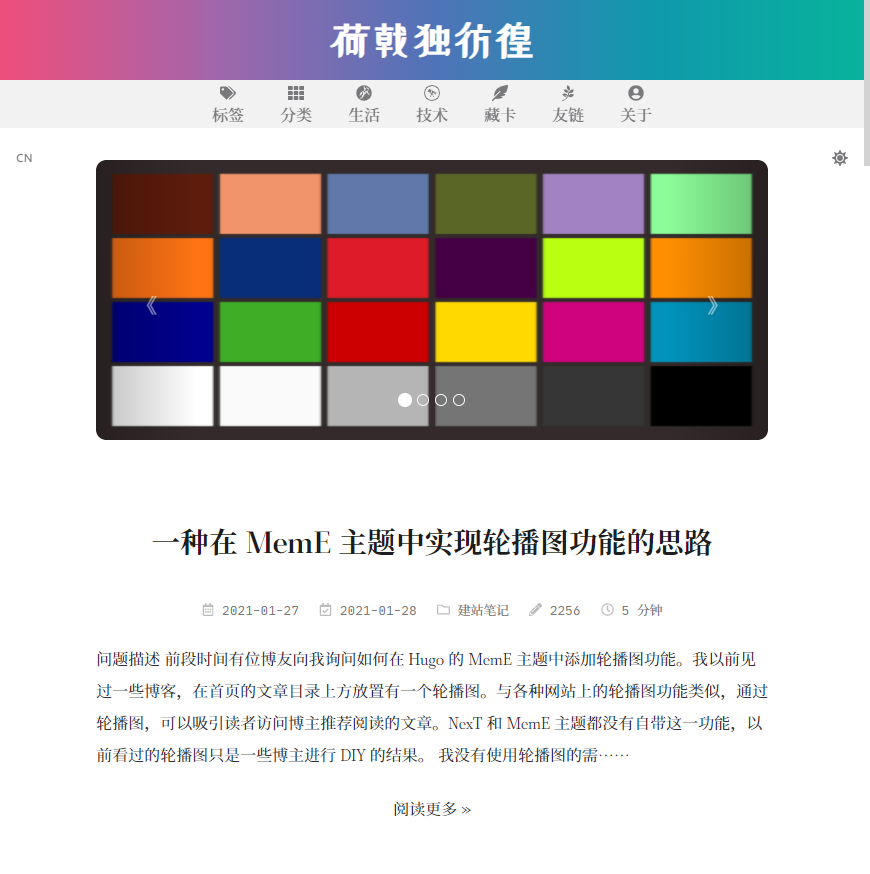
主题首页布局的代码存放在 /layouts/partials/pages/ 文件夹中。比如说,想要将轮播图加入到首页布局为文章摘要的页面,则将该段代码插入到文件夹中的 home-posts.html 文件的 <div class="main-inner"></div> 中。在诗意人生的布局中,将代码插入到 home-poetry.html 的 <div class="poetry"></div> 中。可能在不同的首页布局中,轮播图呈现出来的宽度不同,这里就需要根据具体的情况对 CSS 进行修改,或者调整图片的长宽比。
※ 文章摘要页面
※ 诗意人生页面
经过和博友交流,博友分享了一种更为简单的方法。就是利用 Hugo 博客的简码功能,设定一个简码模板,这样可以灵活地调用轮播图功能,不再局限于在特定页面使用固定图片的轮播图,并且轮播图的样式更加适配主题。有关 Hugo 简码的功能介绍,可以参考我的另一篇文章:《自定义 Hugo Shortcodes 简码 》。这种轮播图取消了轮播的箭头,需要左右拨动图片进行轮播。
首先新增一个名为 carousel.html 的简码模板文件:
 1
 2
 3
 4
 5
 6
 7
 8
 9
10
11
12
13
14
15
16
17
18
19
20
21
22
23
24
25
{{ if .Site.Params.enableCarousel }}
< link rel = "stylesheet" href = "https://cdnjs.cloudflare.com/ajax/libs/Swiper/3.4.2/css/swiper.min.css" >
<!-- Swiper -->
< div class = "swiper-container" >
< div class = "swiper-wrapper" >
{{$itItems := split (.Get 0) ","}}
{{range $itItems }}
< div class = "swiper-slide" >
< img src = "{{.}}" alt = "" >
</ div >
{{end}}
</ div >
<!-- Add Pagination -->
< div class = "swiper-pagination" ></ div >
</ div >
< script src = "https://cdnjs.cloudflare.com/ajax/libs/Swiper/3.4.2/js/swiper.min.js" ></ script >
<!-- Initialize Swiper -->
< script >
var swiper = new Swiper ( '.swiper-container' , {
pagination : '.swiper-pagination' ,
paginationClickable : true ,
});
</ script >
{{ end }}
接着增加 CSS 样式:
 1
 2
 3
 4
 5
 6
 7
 8
 9
10
11
12
13
14
15
16
17
. swiper-container {
width : 100 % ;
height : 100 % ;
margin : 2 em auto ;
}
. swiper-slide {
text-align : center ;
font-size : 18 px ;
background-color : hsla ( var ( -- color - contrast - lower - h ), var ( -- color - contrast - lower - s ), var ( -- color - contrast - lower - l ), 0.5 );
/* Center slide text vertically */
display : flex ;
justify-content : center ;
align-items : center ;
img {
margin : 0 !important ;
}
}
如果在某篇文章中想要插入轮播图,使用如下所示的简码:
1
{{< carousel " URL1 , URL2 , URL3 , URL4 , URL5 " > }}
代码中的 URL1、URL2……URL5 即为图片链接地址,图片数目自行设定,逗号后不能空格。
最后在主题配置文件 config.toml 中的 [params] 下创建新配置:
1
2
# 是否开启轮播图
enableCarousel = true
具体样式如下所示:
对于在 MemE 主题中插入轮播图功能,我提供了一种比较繁琐的方法。需要在主题配置文件 config.toml 中添加新配置,在 data 文件夹中创建新的存储数据,并对主题的首页布局文件进行修改,同时添加新的 CSS 样式。因为我并非计算机专业出身,对前端设计的内容只懂个皮毛,所以,轮播图的代码还有很多值得改进的地方。比如,使用更为简化的循环语句。将第 1 幅图和其他图存在同一个文件中,不用如此麻烦的调用。如果有精通这方面的大佬能够提供更为简化的方法,欢迎交流沟通。
 ※ 文章摘要页面
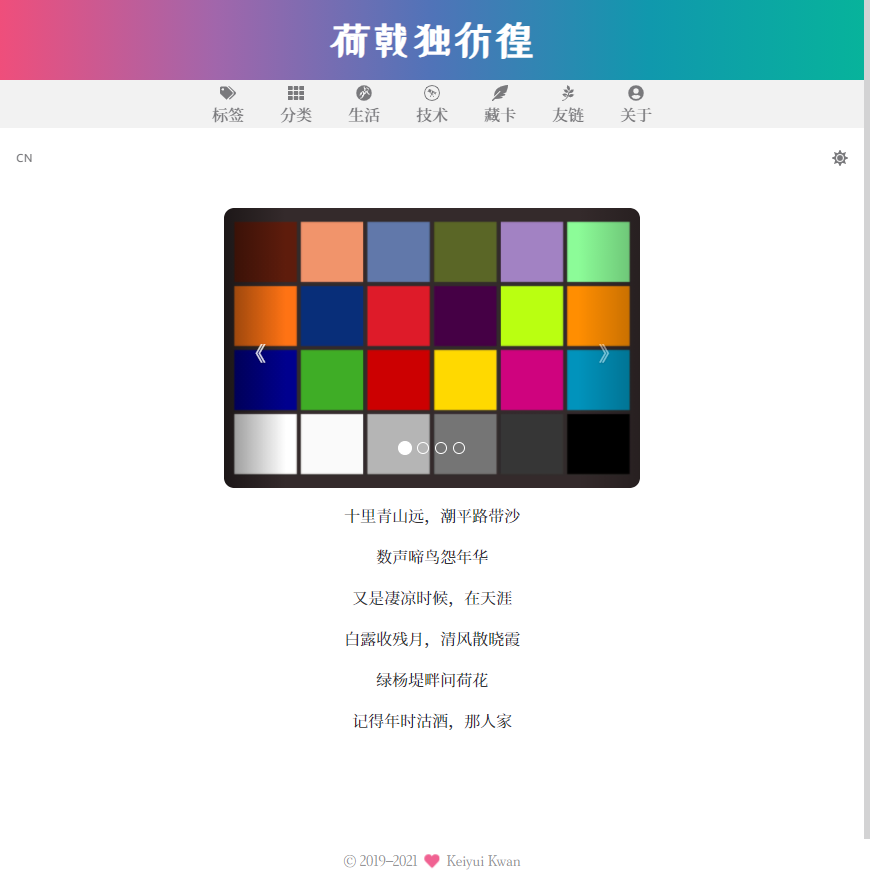 ※ 诗意人生页面